Inventory
Overview
On the Inventory page you can view security posture for each remediated image, highlighting vulnerability reduction and types of fixes applied.
Key information on this page includes:
- Image details - name, profile, initial tag before Remediation and current tag
- Vulnerability reduction metrics
- Remediation summary
- Scan status
You can also:
- Drill down to Reports for vulnerability and fix details, and Artifact Explorer for package- and file-level details.
- Download an image’s SBOM and VEX files
Understanding the Inventory Table
The columns in the Inventory Table are explained below.
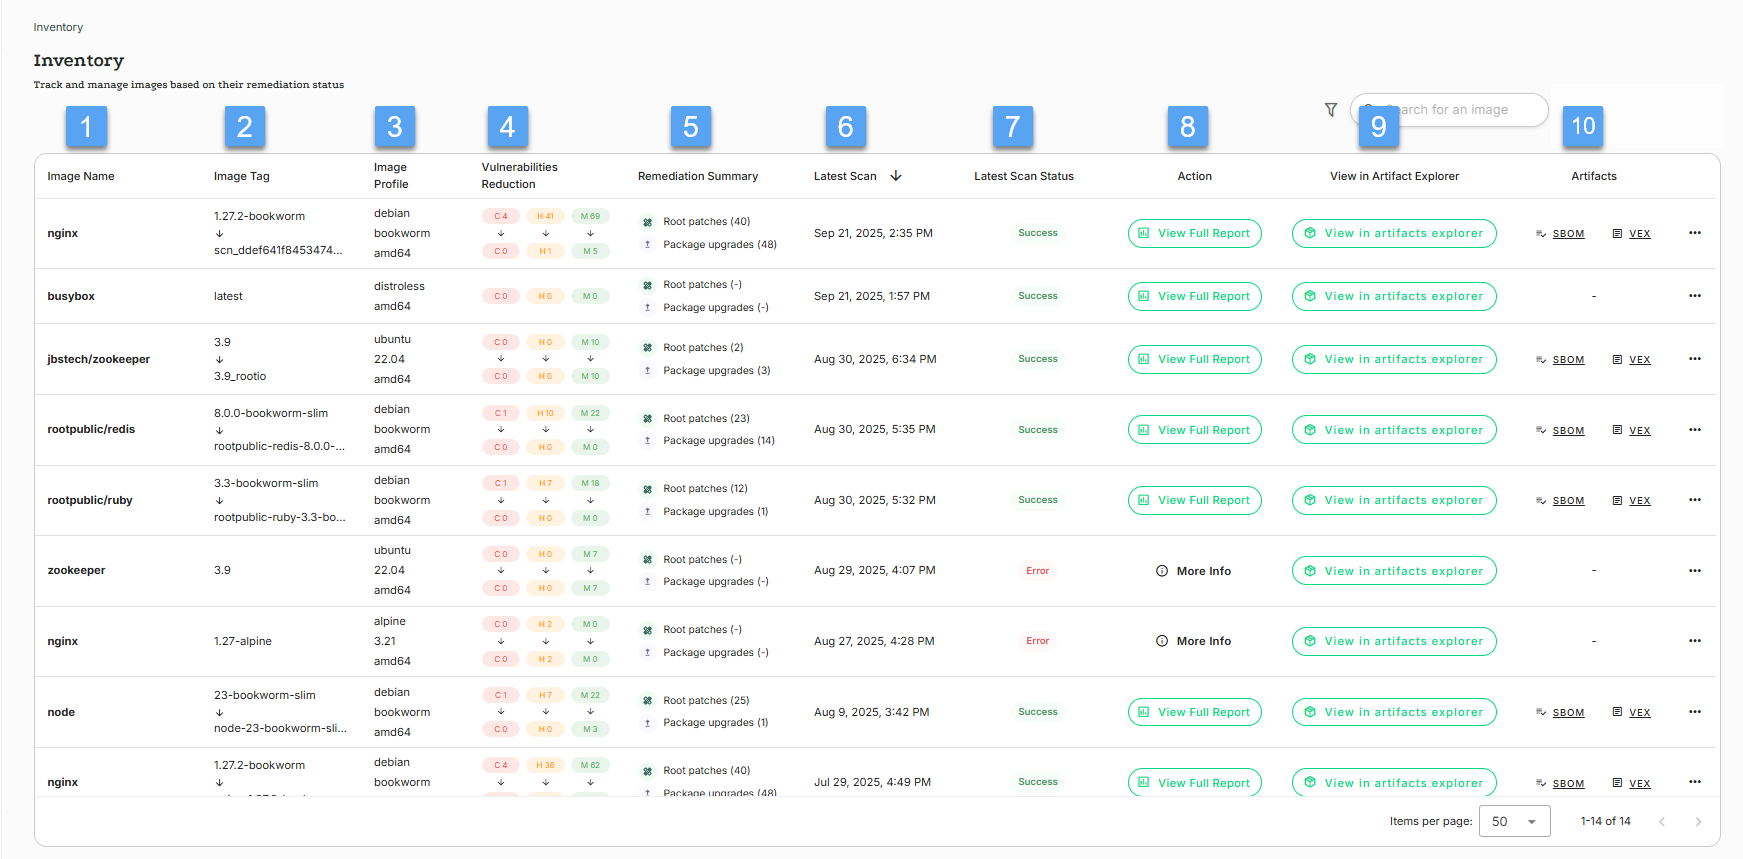
| # | Column Name | Description |
|---|---|---|
| 1️⃣ | Image Name | The base image name (e.g., nginx, ubuntu). |
| 2️⃣ | Image Tag | Original image tag and the tag assigned to the remediated image. Example: Original tag: 3.12-slim-bookworm Remediated tag: python-3.12-slim-bookworm-scn_804a_rootio |
| 3️⃣ | Image Profile | OS and architecture info. Example: debian bookworm amd64 |
| 4️⃣ | Vulnerability Reduction | Reduction in Critical, High, and Medium vulnerabilities after remediation. Example: Critical: 3 → 0 High: 6 → 0 Medium: 27 → 2 |
| 5️⃣ | Remediation Summary | Number of Root Patches and Native Distribution Upgrade Packages applied. Example: 35 Root Patches, 2 Native Distribution Upgrades |
| 6️⃣ | Latest Scan | Date and time of the latest scan. |
| 7️⃣ | Latest Scan Status | Status of the latest scan (Success or Error). |
| 8️⃣ | Action | Click to go the the Reports page, or get more information about failed remediations. |
| 9️⃣ | View in Artifact Explorer | Go to Artifact Explorer for detailed package- and file-level information and remediation history. |
| 🔟 | Artifacts | Click to download SBOM or VEX files. |
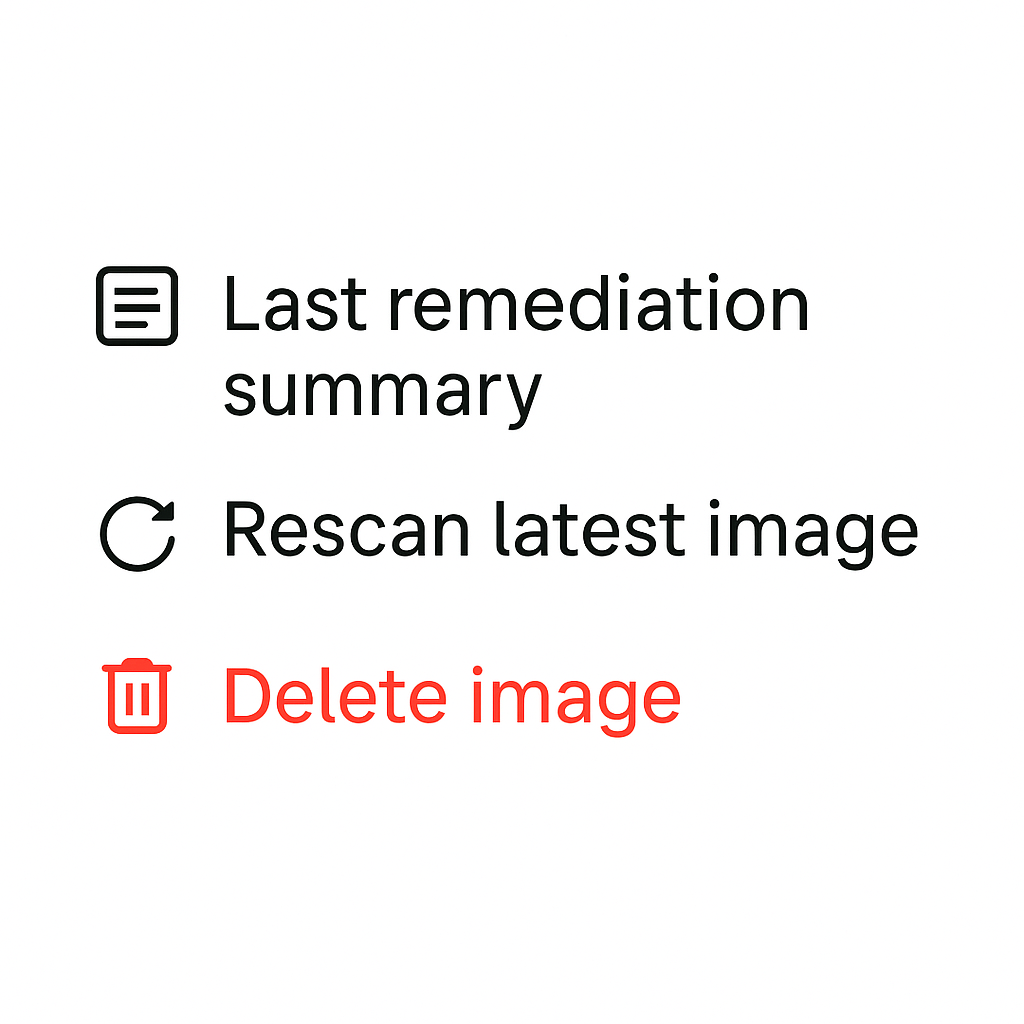
Further Action Menu
From the ... menu at the far right, you can: go to a summary of the last remediation, rescan the latest image, or delete the image.
Updated about 1 month ago