Remediate Image
Overview
Root remediation can be initiated by script, CLI or from the admin portal. This page explains how to run an AVR Remediation scan from the admin portal.
The steps differ slightly depending on whether you are remediating a public image, or one from your private image registry.
Architecture Type
Note: If your image is built for arm64, select arm64 in the Image architecture setting.
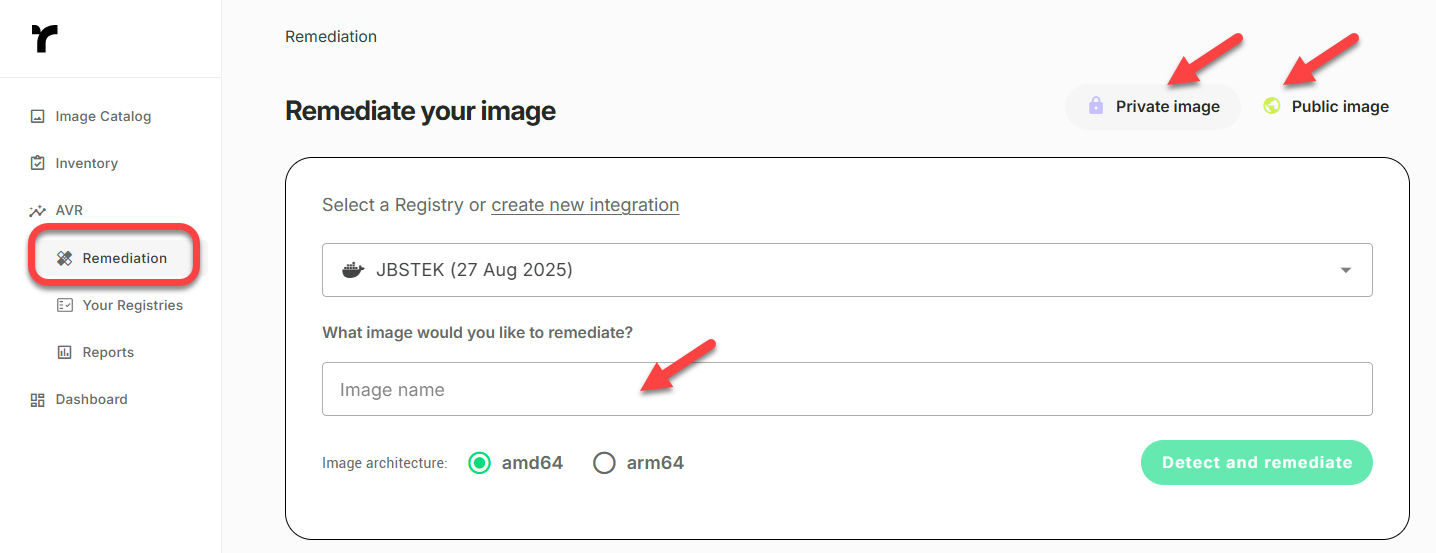
Step 1 - Select Image
Select Private Image
To remediate an image from a private registry:
- Click Remediation and then click Private Image.
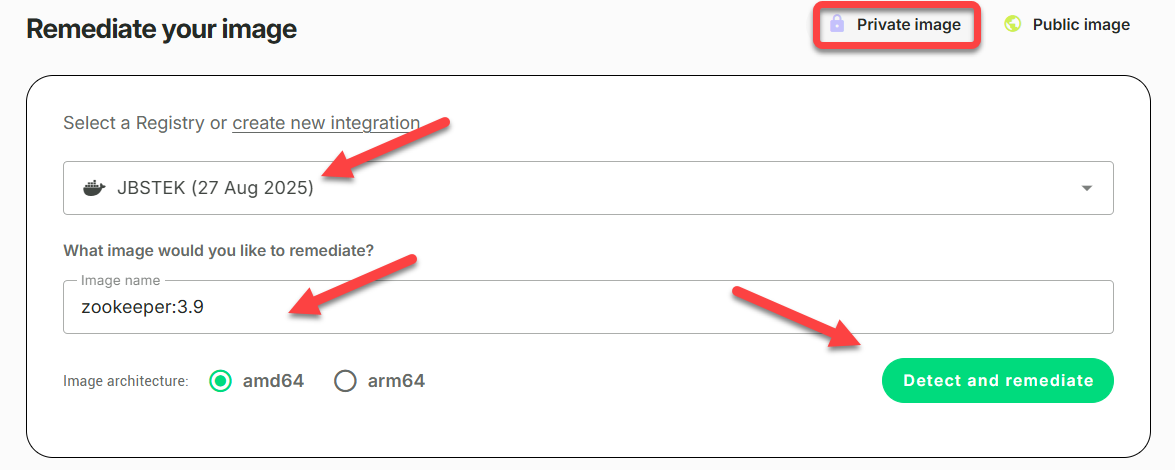
- Select a Registry from the list of Integrated Registries, and then enter an image reference in Image name.
Notes:
a. If you have not yet connected your image registry to Root, you will be prompted to do so when you select Private Image.
b. The image reference format is
< image_repo>:<image_tag >. For example,python:3.12ornginx:latest.
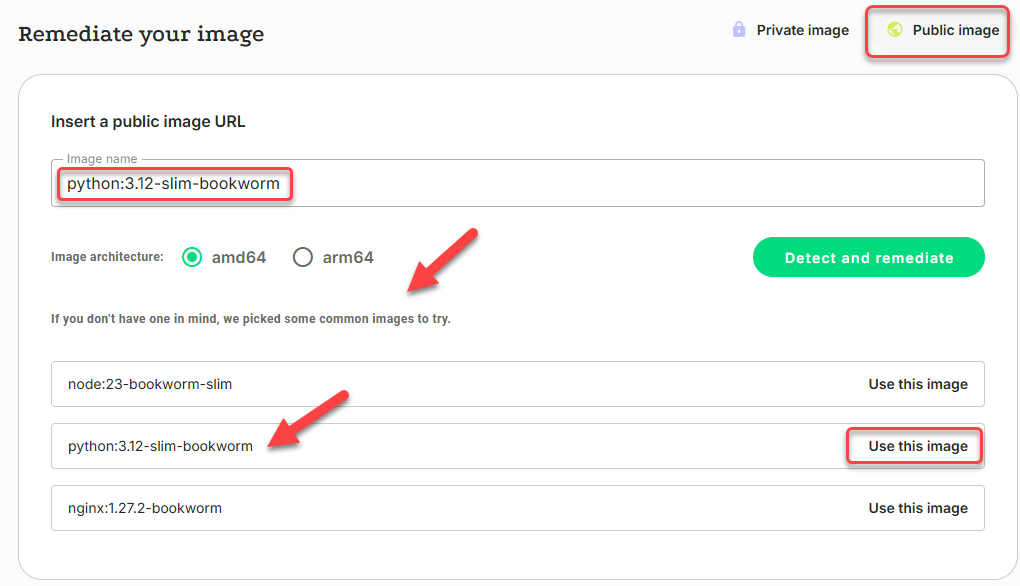
Select Public Image
To remediate an image from a public registry:
- Click Remediation and then click Public Image.
- Enter an image reference in Image name.
If you do not have a public image in mind, you can click on one of the common images listed, or see Image Catalog for an even larger selection of common public images.
Note
The image reference format is
< image_repo>:<image_tag >. For example,python:3.12ornginx:latest.
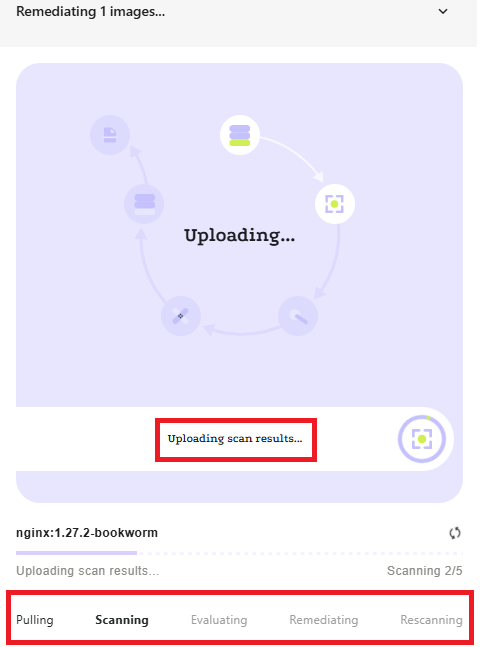
Step 2 - Remediate
Now, that you have selected an image, go ahead and initiate Remediation:
- Click Detect and Remediate.

Remediation flow begins and takes a few minutes.
- Track the progress of the Remediation. Check out Root AVR Remediation Flow for a deep dive into the inner workings of the remediation process.
Step 3 - Scan Complete

Private Image
Your remediated private image has now been pushed into your registry.
Public Image
The remediated image is pushed into Root's ECR registry and will be available for 15 minutes. The remediated image's tag is shown below the summary. Click to copy the tag and use it to pull the image to your own repository.

Step 4 - Explore Your Security Insights
Now let's explore the Remediation Summary.
- The summary shows the highest level details of the Remediation. In the example below, 3 critical-level CVEs, 6 high-level CVEs, and 20 medium-level CVEs have been fixed.
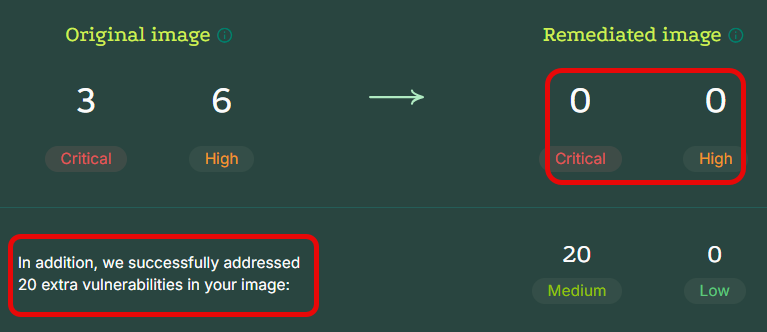
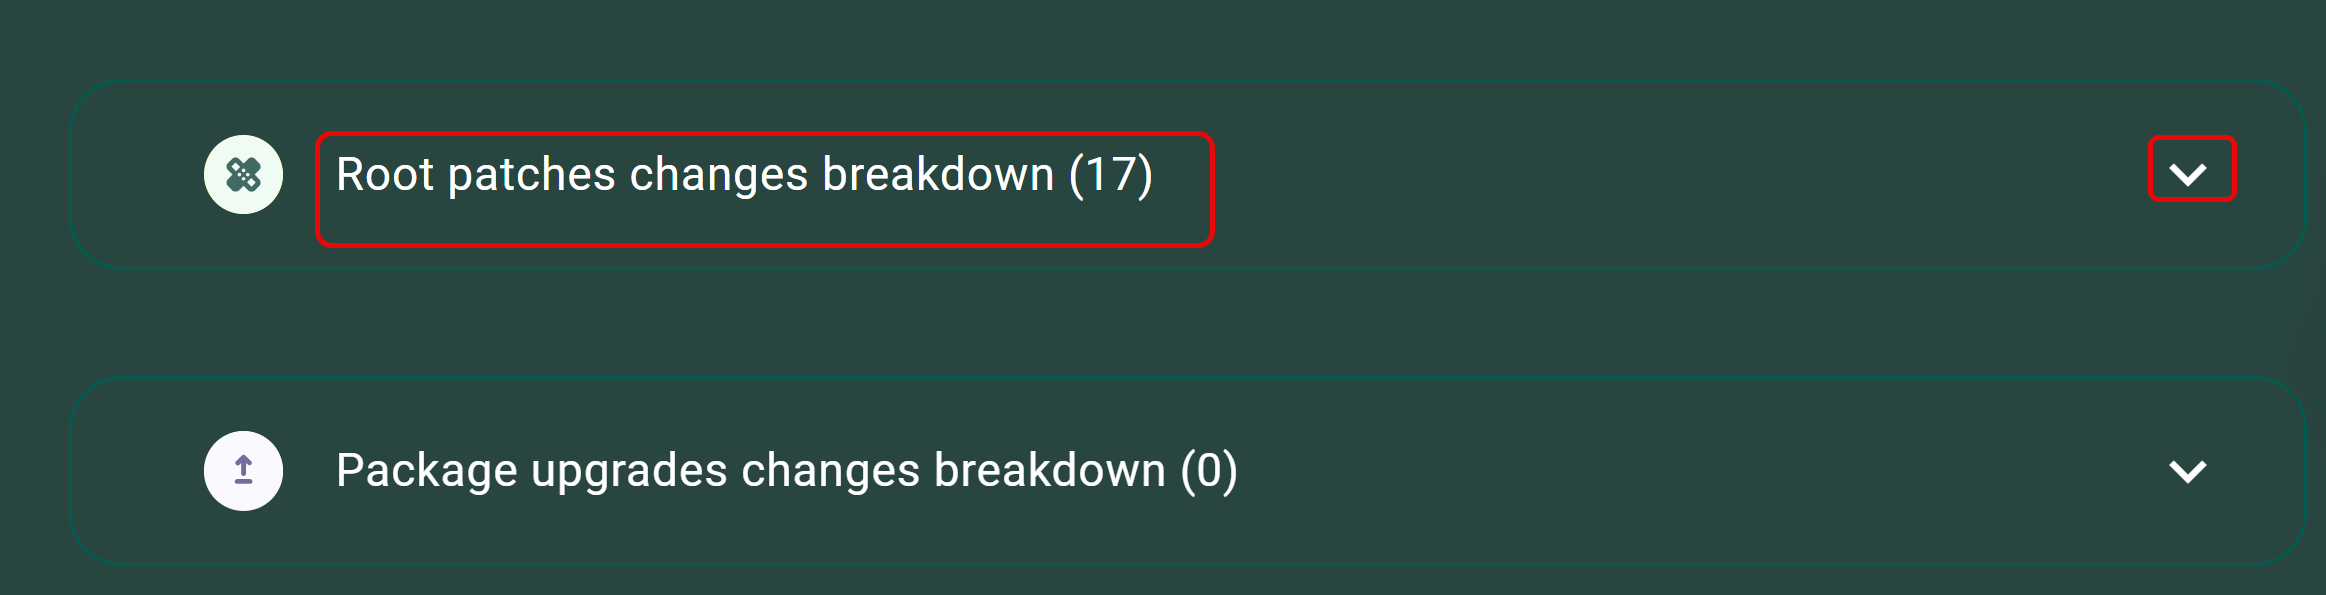
- A remediated image may include a combination of Native Distribution Upgrade Packages and Root Patches. In the remediated image in our example, 17 Root Patches have been applied and no Native Distribution Upgrade Packages.
- Click the down-arrow to view details.
Deeper Understanding
- Native Distribution Upgrade Packages are packages that correct the vulnerability and are distributed by the maintainer of the package.
- Root Patches are created by Root when no fix is found that is compatible with your image's OS and OS version. These packages include targeted fixes backported from fixes found in other versions.
- Note that Root adds
.root.ioand a Root Patch version number to the original tag of a Root Patch.
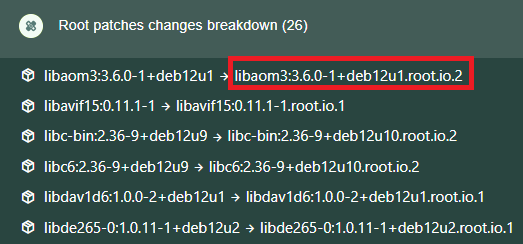
Root Fix-Packages
Further Remediation Details
Now click View remediation report or View change in Artifact Explorer to access one of Root's insight options and get more details about the inner workings of the remediation.

See also Reports and Artifact Explorer.
Updated 19 days ago