Prerequisites
- Admin access to your Okta organization
- A Root support contact to complete the Auth0 side of setup — contact Root if you don’t have one
- A
CONNECTION_NAMEagreed upon with Root (see Step 1) - Group names should be
root-io-admins,root-io-membersandroot-io-readonlys. if they need to change, contact Root support.
Step 1: Define a Connection Name
Choose aCONNECTION_NAME that will be used in both Okta and Auth0 to identify this integration.
Format requirements:
- All lowercase
- No spaces
- No special characters
acme-okta-saml
Step 2: Configure Okta
2.1 Create a SAML 2.0 App Integration
- In your Okta Admin Console, go to Applications > Applications
- Click Create App Integration
- Select SAML 2.0 and click Next
- In General Settings, enter an app name (e.g.,
Root SAML 2.0) and click Next
2.2 Configure SAML Settings
In the Configure SAML tab, enter the following:
Replace
CONNECTION_NAME with your chosen value from Step 1. For example, using acme-okta-saml:
Scroll down and click Next, then Finish on the Feedback tab.
2.3 Collect IdP Values for Root
In the Sign On tab:- Click View SAML setup instructions
- Copy the Identity Provider Single Sign-On URL
- Click Download Certificate to get the X.509 certificate file (
okta.cert) - if file is not downloaded when clicking the link, right-click the button and select ‘Open link in new tab’
If the certificate download does not trigger, open the link in a new browser
tab.
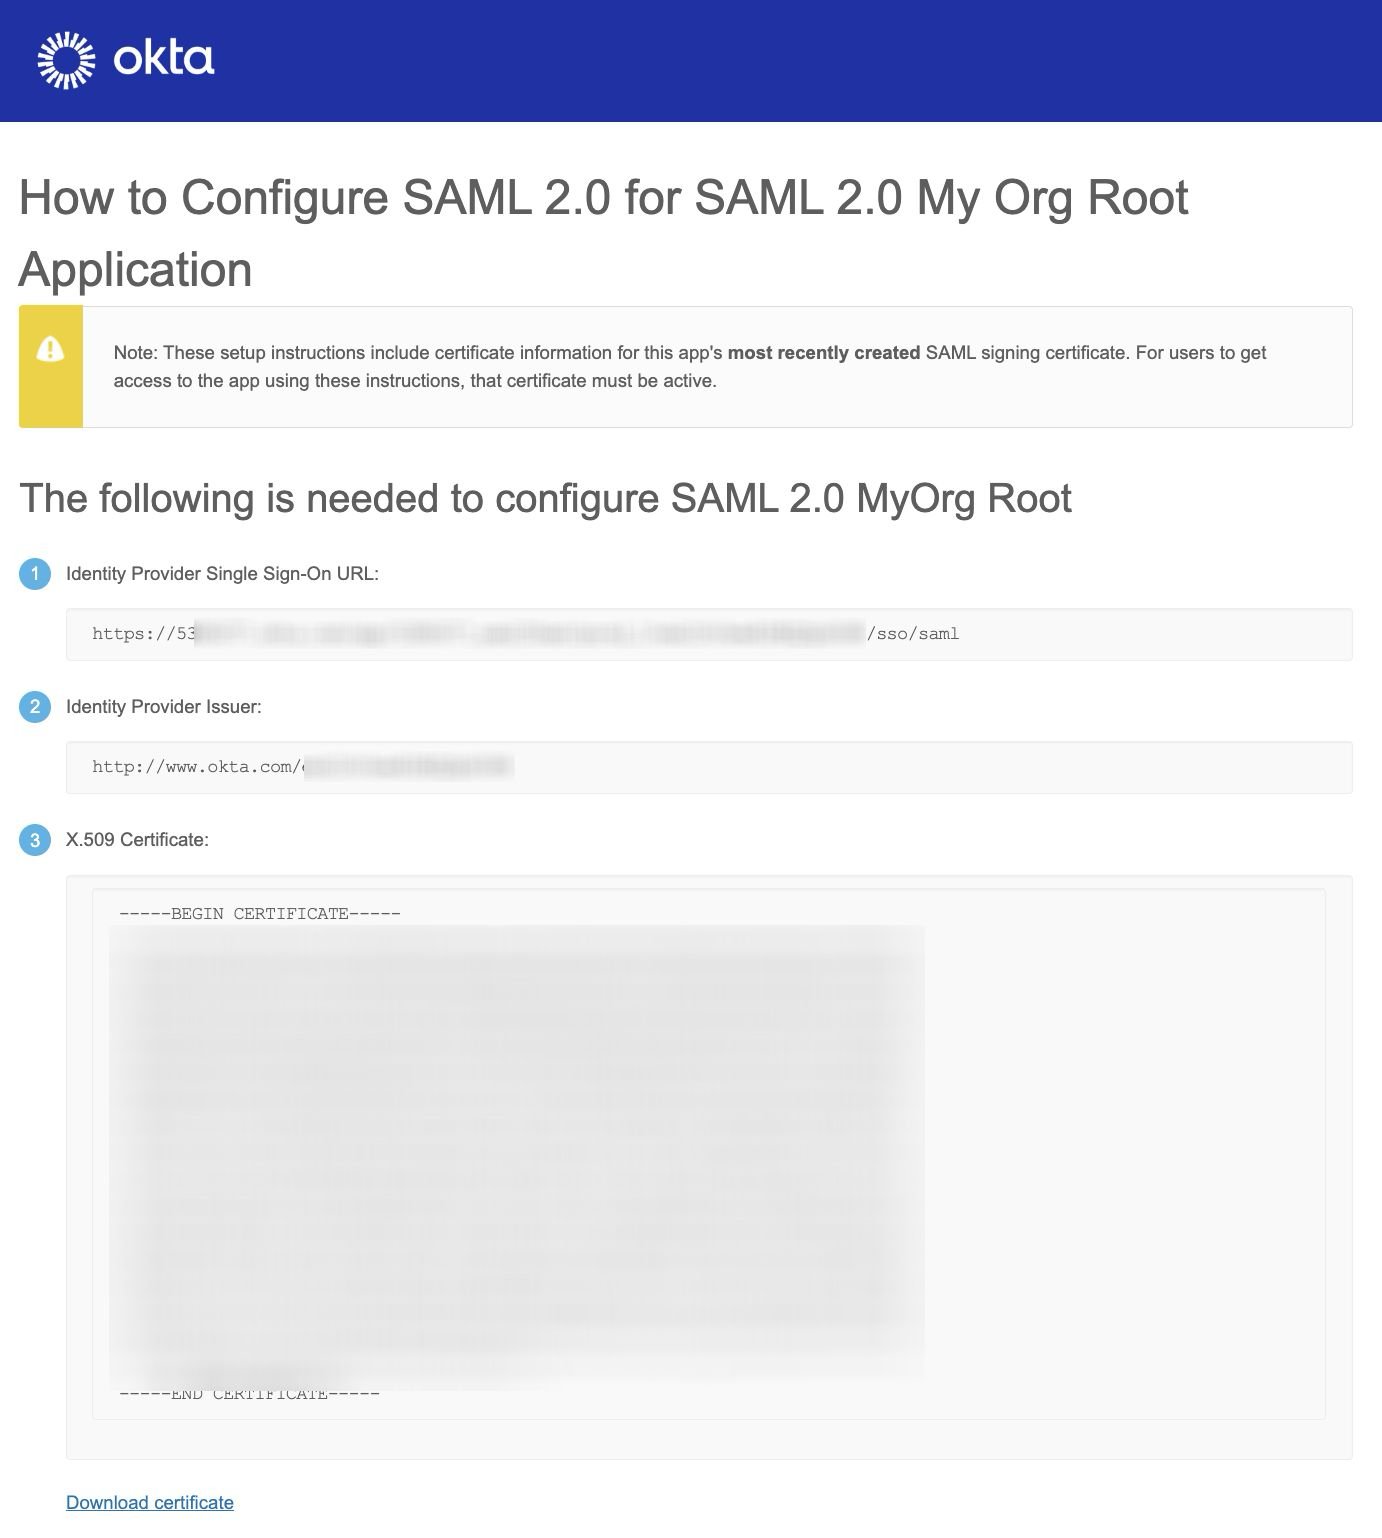
Copy the Single Sign-On URL (item 1) and click Download certificate at the bottom of the page to save the X.509 certificate file.
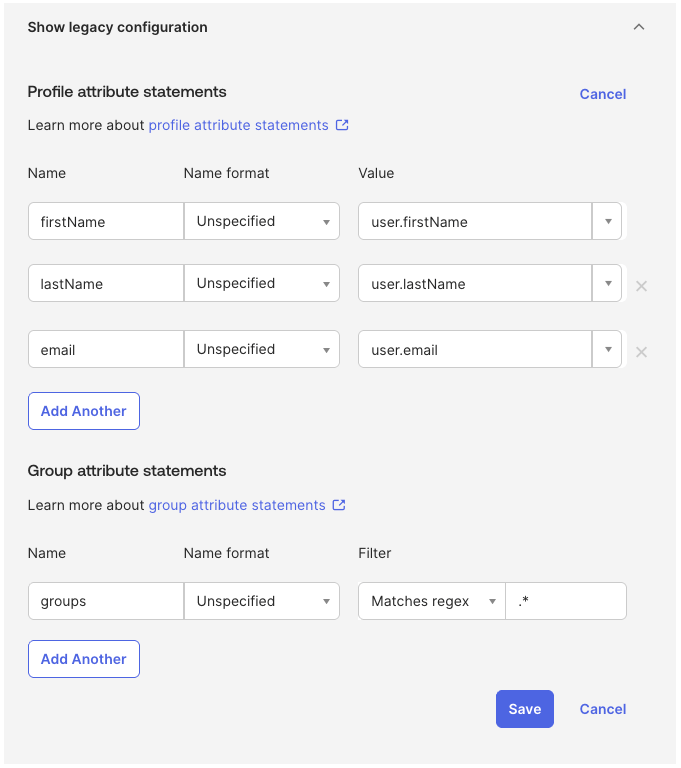
2.4 Add Attribute Statements
Still in the Sign On tab:- In the Attribute statements panel, click Show legacy configuration
- Click Edit under Profile attribute statements
- Add the following three rows:
- Under Group attribute statements, have a single row and enter the following:
- Click Save
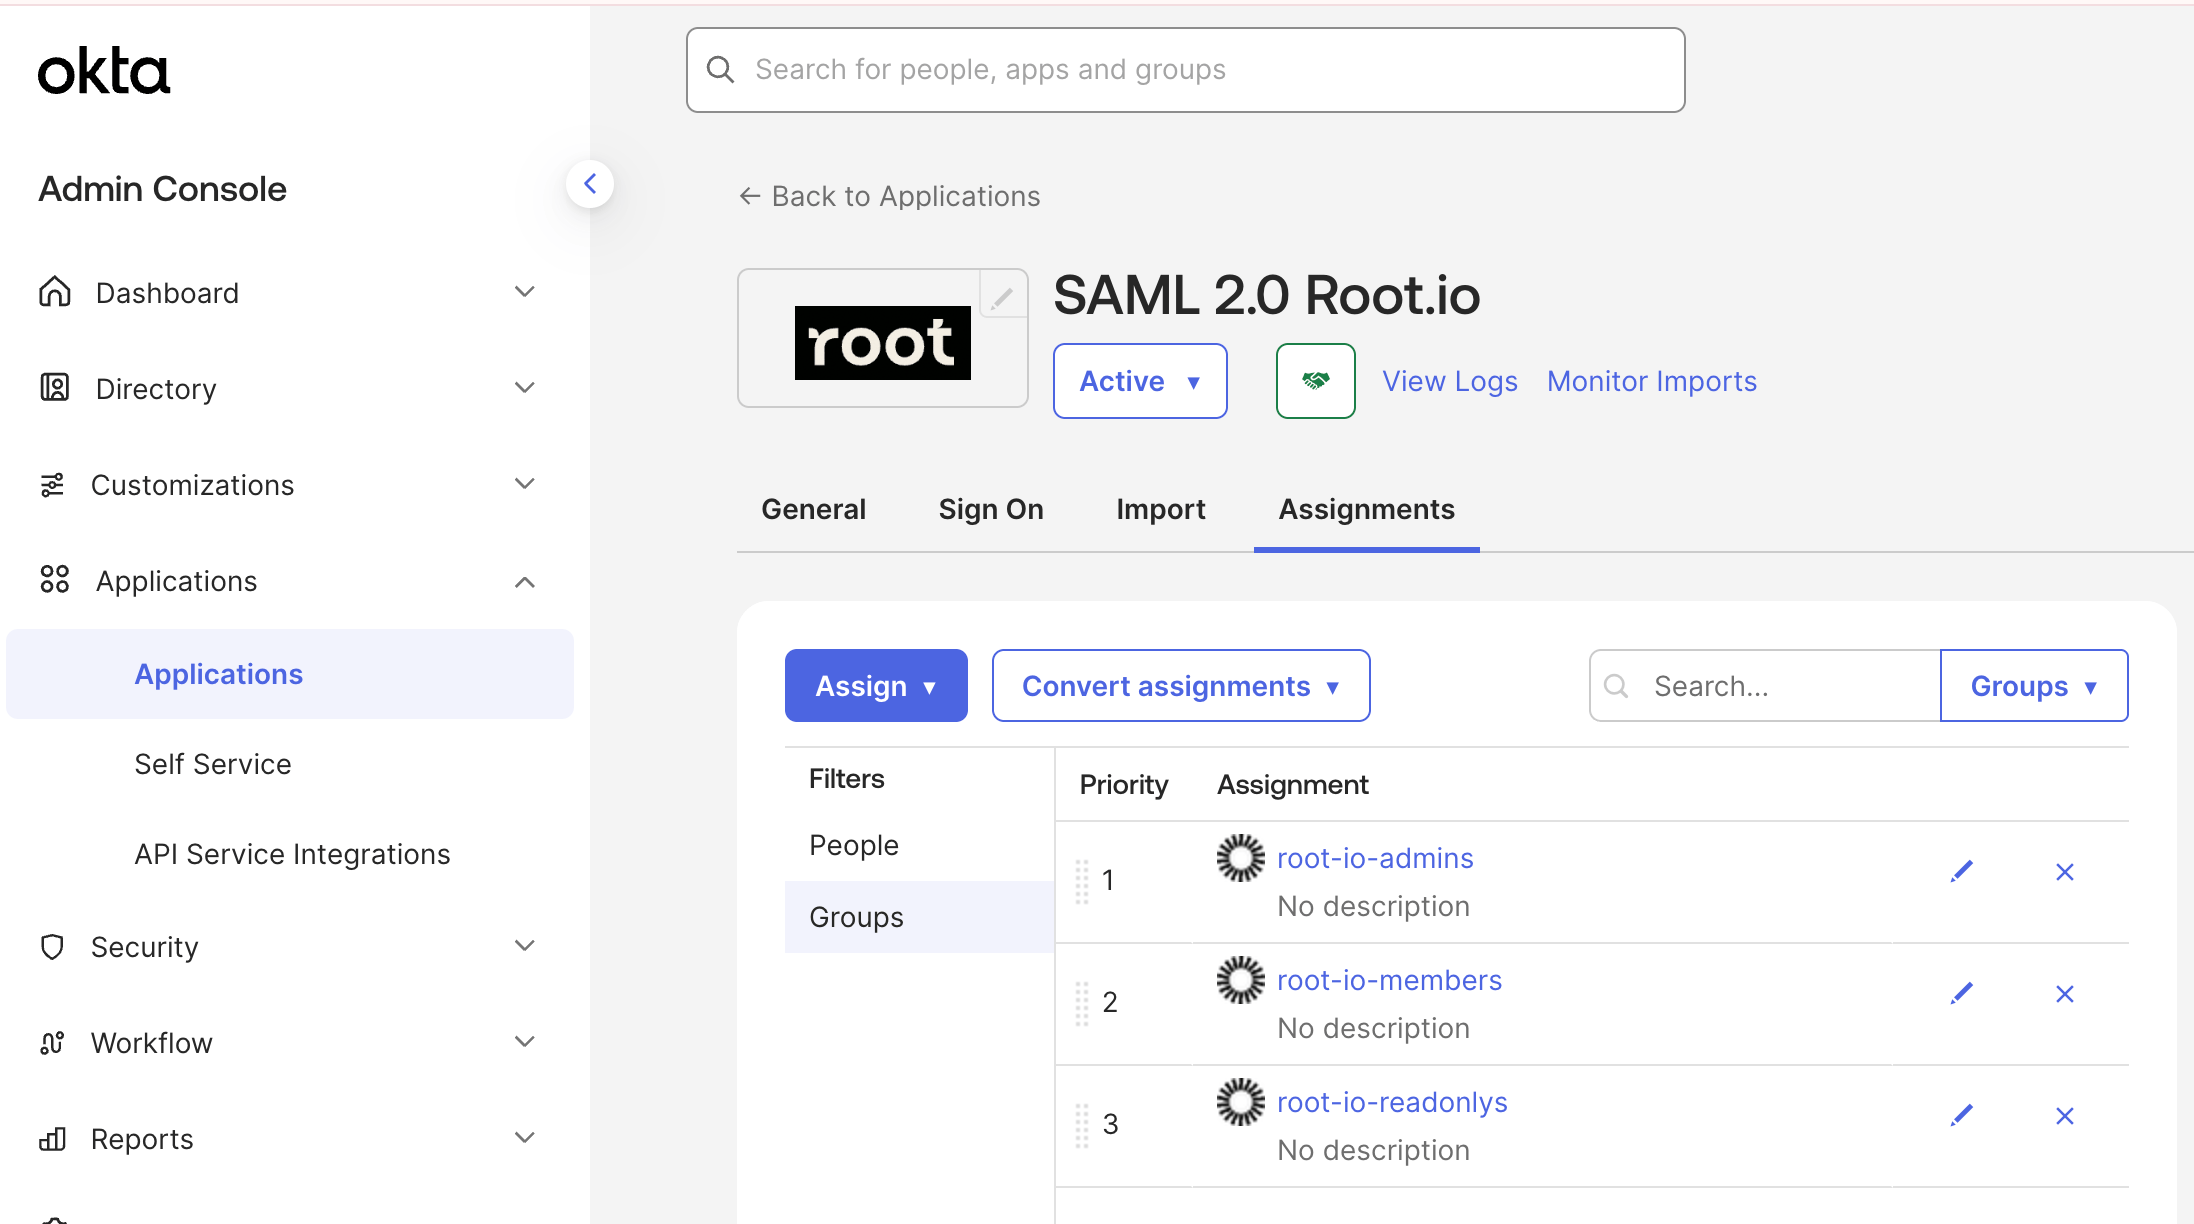
2.5 Assign Groups
- Go to Directory > Groups
- Click Add group and add 3 groups
root-io-adminsroot-io-membersroot-io-readonlys
- For each group, assign the appropriate people
- Go to the Applications > Application > [app] tab for your app
- Click Assign > Assign to groups
- Assign the 3 groups and click Save, then Done
the connection will work without groups, but without them set up correctly,
all users will be in read only mode.
When moving a member from one group to another or removing from a group, the changes in it’s role in Root.io app will only update once after the user goes through the app’s login page.
Step 3: Hand Off to Root
Once Okta is configured, provide the following to your Root support contact:
Root will complete the Auth0 configuration and confirm when the connection is ready to test.
Step 4: Verify the Integration
Once Root confirms setup is complete:- Log in to the Root platform at app.root.io using your Okta credentials
- Confirm successful authentication and that your user profile (name, email) appears correctly
Troubleshooting
If you encounter other issues, contact Root support with any error messages or screenshots.